Table of ContentsClick to view all sections
Government Job Documents: A Practical Preparation Guide
Applying for a government job often involves more than filling in a form and sitting an exam. You may need to upload records during the application, carry proof to an exam centre, or present original documents at a later verification stage. The exact requirements differ between recruitment bodies, posts and states, so there is no single document set that suits every application.
Use this guide to organise common records, spot issues early and prepare for each stage. Treat the current official recruitment notification and instructions on the responsible recruiting body’s website as the final authority. If a requirement is unclear, seek clarification through the official channel before submitting your application.
Government Job Documents: Start with the notification, not a generic checklist
Before collecting papers, read the complete notification for the specific post. Check the sections on eligibility, age, reservation, application instructions, required uploads and document verification. Also review official corrigenda, revised instructions or notices published later. Requirements can differ even between posts run by the same department.
Make a short list of every document the notice names and note when it is needed. A certificate requested at application may need to be uploaded in a particular format; another may only be checked during verification. Do not assume that a document is compulsory, that a particular format will be accepted, or that a relaxation applies unless the recruitment instructions say so.
- Record the stage: application, examination, skill test, interview or verification.
- Record the exact wording: note any prescribed form, issuing authority, date condition or other qualification.
- Check updates: revisit the official recruitment page for changes after you apply.
- Ask the right authority: for document or eligibility questions, use the official recruitment helpdesk or contact details published in the notice—not a social-media post or an unofficial agent.
Common document groups to prepare
The categories below are useful starting points, not a universal mandatory list. Keep a document only if it is relevant to you and to the recruitment instructions.
1. Identity and personal details
Keep a clear, valid identity document available, along with any other identity proof specifically accepted by the recruiting body. Examples may include a passport, voter identity card, driving licence or Aadhaar, but acceptance depends on the instructions for that recruitment and stage. Do not assume that one form of ID can replace another simply because it was accepted for a previous exam.
Check that your name and other details match the application and the records you will present. An identity document is not necessarily proof of date of birth, address, nationality or eligibility for a particular post; use the record the notice asks for.
2. Photograph, signature and application records
Some online forms request a recent photograph, a scanned signature or other image files. Follow the portal’s current file type, size, dimensions and image instructions exactly. A photograph that looks clear on a phone may become unreadable after cropping or compression, so inspect the final uploaded file.
Save the submitted application, registration number, payment acknowledgement if applicable, confirmation page and any official messages. These records help you check what you declared and retrieve application details later. Keep them private, particularly where they contain contact information or identity details.
3. Educational and technical qualifications
Depending on the post, you may need school certificates, mark sheets, a degree or diploma certificate, a provisional certificate, professional registration or proof of a technical qualification. The notification determines which qualification counts, what subject or level is required and the relevant cut-off date, if one is stated.
Keep both certificates and mark sheets where available. A degree certificate may establish that a qualification was awarded, while mark sheets can show subjects or results; one does not always substitute for the other. If the final certificate has not been issued, check whether the recruitment instructions accept a provisional certificate or another record. Do not assume that an appearing candidate, pending result or equivalent qualification is eligible without checking the stated conditions.
If your qualification was obtained outside India, or you are relying on an equivalence claim, follow the notification’s requirements and obtain any requested supporting evidence. Do not describe a qualification as equivalent based only on an informal comparison.
4. Date-of-birth proof
Use the proof of date of birth named in the recruitment instructions. This may be a school record or another specified document. Check the date against the application before submitting it, and keep the relevant original and supporting records ready for verification. If different records show different dates, do not choose whichever seems most convenient; find out what the recruiting body accepts and how to address the discrepancy.
5. Category, reservation and related certificates
If you claim a reservation category or another benefit, read the eligibility and certificate instructions carefully. The required wording, issuing authority, prescribed format, relevant date or period and other conditions may vary by recruitment and jurisdiction. This is especially important for certificates relating to Scheduled Castes, Scheduled Tribes, Other Backward Classes, Economically Weaker Sections, persons with benchmark disabilities, ex-servicemen or other specified groups.
For example, an OBC certificate may need to address non-creamy-layer status under the rules applicable to the recruitment. An EWS certificate may need to follow a prescribed format and relate to a specified period. These are not details to infer from an older application: check the current notification and its linked format. A certificate issued by an authority or in a format that does not meet the stated conditions could lead to questions about a claim.
If you do not have the required certificate, contact the competent issuing authority well in advance and ask about its process. A receipt for an application to obtain a certificate is not automatically accepted as a substitute. If the notice provides a route for a particular situation, follow that route and retain any supporting correspondence.
6. Domicile, residence or local-language evidence
Some recruitments specify a domicile, residence, region, language or other local eligibility condition. Others do not. Where such proof is requested, check which document and issuing authority are acceptable and whether any date or duration condition applies. Do not treat an address printed on an identity card as a domicile certificate unless the instructions expressly allow it.
7. Experience, professional status and special permissions
For posts requiring experience, gather employer-issued certificates that clearly support the information requested, such as role, period of service and organisation. Keep appointment or relieving records where relevant, but confirm which evidence the notice accepts. If self-employment or a particular form of experience is being claimed, check whether the recruitment rules provide for it and what proof is required.
Some applicants may also need professional registration, a licence, a disability-related document, an ex-serviceman record or an employer’s No Objection Certificate. These apply only where relevant to the post and the applicant. Follow the specific instructions for the document’s issuing body, form and timing rather than relying on a general checklist.
A simple preparation process
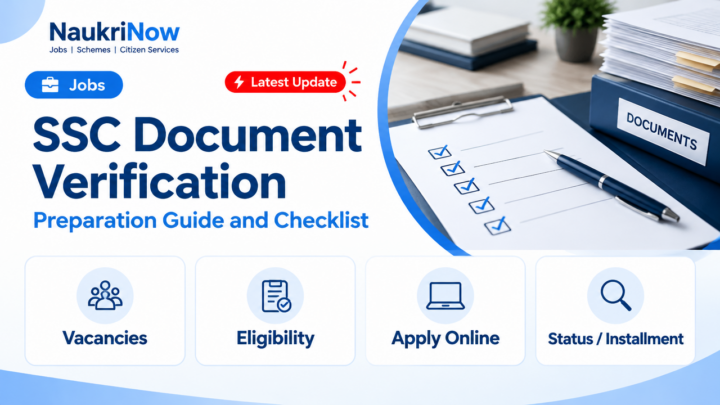
- Build a requirement list. Read the full notice and make a checklist of each document, who needs it and the stage at which it is required. Add any instructions from the application portal or later official updates.
- Match details across records. Compare your name, date of birth and other relevant particulars with the application. Check spelling, initials, order of names and any differences caused by abbreviations or transliteration.
- Check certificate conditions. For category, residence, experience or other eligibility evidence, verify the prescribed format, issuing authority and any stated date or validity condition. Contact the issuing authority if a correction or replacement is needed.
- Prepare readable digital copies. Scan or photograph documents in good light, include all relevant edges and pages, and save them in the format and size allowed by the portal. Open each file after saving to check that it is complete and legible.
- Organise originals and copies. Keep originals safe and arrange copies in the order requested for any in-person stage. Do not hand over an original unless an authorised official procedure requires it; ask for a receipt if a document is retained.
- Recheck before each stage. The exam, skill test, interview and verification can have different instructions. Read the latest official notice for that stage, including rules for photo ID, admit cards, permitted items and reporting documents.
Set up a secure document folder
A little organisation can prevent last-minute confusion. Create a folder for each recruitment rather than mixing files from multiple applications. Use clear filenames such as Degree_Certificate or Category_Certificate, and keep a separate checklist showing which documents have been uploaded, submitted or carried. Avoid putting sensitive numbers in filenames.
Keep a protected backup of important files in a secure location you can access when needed. Limit sharing of scans containing identity numbers, signatures or personal information. Upload documents only through the official portal or another channel expressly identified by the recruiting body. Do not send sensitive records to an individual claiming to be an agent or recruiter through an unverified messaging account.
If you use a digital document service, confirm that the recruitment instructions accept that form of record and explain how it must be presented. Do not assume that a digital copy, screenshot or downloaded file will replace an original or a prescribed upload.
When details do not match
Small differences can create avoidable delays: a surname appears in a different order, a certificate uses initials, a spelling differs between languages, or a date is inconsistent across records. Do not edit a scan to make documents look alike. That can undermine the credibility of the record and may amount to misrepresentation.
First identify which record is incorrect and whether an issuing authority can correct or reissue it. If a genuine name change or other lawful change explains the difference, collect the supporting documents recognised for that purpose and check the recruitment instructions on how to present them. Where the discrepancy cannot be resolved before a deadline, contact the official recruitment authority in writing and retain its response. Only the responsible authority can tell you how it will assess the case.
Common mistakes to avoid
- Using last year’s instructions: an older format or certificate may not satisfy the current notice. Verify each recruitment separately.
- Claiming a category without checking its conditions: confirm eligibility and certificate requirements before selecting a category in the form.
- Uploading the wrong file: open each upload and check that it is the intended document, complete, readable and within the portal’s limits.
- Assuming an application receipt is enough: a pending certificate or qualification is accepted only if the official instructions say so.
- Ignoring later notices: keep checking the official portal for revised verification instructions or other updates.
- Carrying only photocopies: if originals are requested for verification, copies alone may not meet the requirement. Conversely, do not carry or submit extra sensitive records without reason.
- Trusting unofficial promises: no agent can guarantee acceptance of a certificate or selection. Verify instructions directly with the responsible body.
Examples: applying the checklist
Example 1: A graduate applying for an entry-level post. The applicant reads the notice, identifies the required degree and date-of-birth evidence, then checks that the name on the application matches the degree records. They prepare mark sheets as supporting documents but do not assume they replace the certificate. If the notice specifies a particular qualification cut-off, they check that condition before applying.
Example 2: An applicant claiming a reserved category. The applicant checks the exact category criteria, certificate format, issuing authority and any date condition in the current notice. They compare their certificate with the prescribed requirements and contact the issuing authority if it needs updating. They do not rely on an older certificate or assume that a different category document is interchangeable.
Example 3: A candidate with a name variation. The candidate finds that a school record uses initials while later records show a full name. Instead of changing a scan, they check the official verification instructions, seek any appropriate supporting record from the relevant authority and ask the recruiting body how to present the difference. They keep the response with their application papers.
Frequently Asked Questions
1. Are the same documents required for every government job?
No. Requirements depend on the recruiting body, post, eligibility conditions and stage. Use the notification for the specific recruitment, including any official updates, as your checklist.
2. Is Aadhaar compulsory for every government job application?
Do not assume that it is compulsory or that it is accepted in every situation. Check the application and examination instructions for the identity documents permitted at each stage.
3. Can I use a digital copy instead of an original?
Only if the relevant instructions allow it for that upload or verification stage. A portal may accept a scan for an application while requiring originals later. Follow the directions for each stage.
4. What if my certificate is still being processed?
Check whether the notice explicitly allows an application receipt, provisional proof or later submission. If it does not, ask the responsible recruitment authority through its official channel. Do not assume pending proof will be accepted.
5. Do category certificates have to be in a particular format?
They may. Check the notification and any linked format for wording, issuing authority and date conditions. These requirements can differ, so an older certificate is not automatically suitable.
6. What should I do if my name is spelt differently across documents?
Do not alter the documents. Find out whether the issuing authority can correct the record, gather legitimate supporting evidence for any name change, and ask the recruiting body how to handle the mismatch.
7. Where should I check if a document requirement is unclear?
Start with the official notification, recruitment portal and any later official notices. If they do not answer the question, use the contact channel published by the recruiting body. For the certificate itself, consult the relevant issuing authority.
Conclusion
Preparing government job documents is mainly a matter of reading the right instructions, checking details early and keeping records organised. Build your checklist from the current official notification, verify any certificate-specific conditions with the relevant authority and prepare files carefully for each stage. When rules or acceptance are unclear, seek an answer from the responsible official source rather than relying on assumptions. A careful process can reduce avoidable errors and leave you better prepared for application and verification.

Comments